
Guide for New Users on Adding Proxies to InviBrowser
Guide on how to add HTTP, SOCKS4, SOCKS5 proxies to InviBrowser, bulk import proxies, check proxy status, and assign proxies to Browser Profiles.
Guide on how to add HTTP, SOCKS4, SOCKS5 proxies to InviBrowser, bulk import proxies, check proxy status, and assign proxies to Browser Profiles.
If you are new to InviBrowser, one of the first and most important steps is to add proxies and assign the appropriate proxy to each Browser Profile.
A proxy helps change the IP address that websites see when you access the Internet. Instead of all Profiles directly using your current network IP, you can set up a separate proxy for each work environment.
InviBrowser supports HTTP, SOCKS4, and SOCKS5, and allows adding proxies individually or importing them in bulk, checking their status, and assigning them directly to Browser Profiles.
Start your free InviBrowser experience to create Browser Profiles and configure Proxies according to your usage needs.
Want to see a live demo? Watch the video Guide for new users on adding proxies to InviBrowser to follow the entire process from adding a proxy, checking its status, to assigning the proxy to a profile.
What types of proxies does InviBrowser support?
Currently, InviBrowser supports the following common types of proxies:
-
HTTP
-
SOCKS4
-
SOCKS5
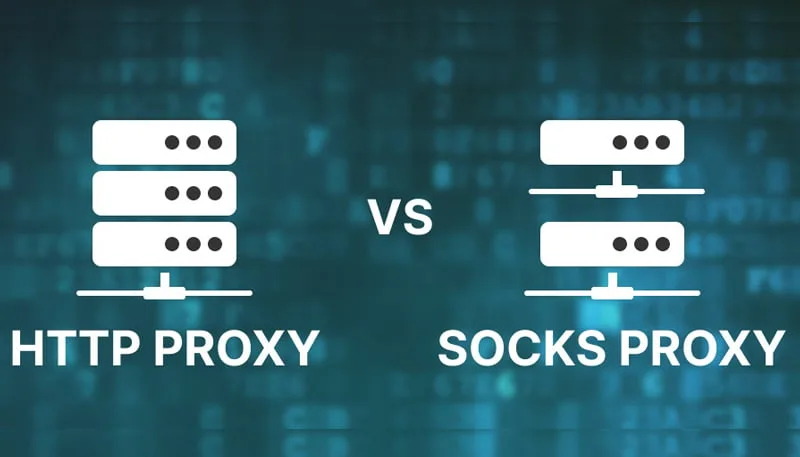
In addition, when adding a Proxy, you can select the Auto mode to let InviBrowser automatically detect the Proxy type instead of selecting it manually.
This is convenient when you have multiple proxies or are not sure which protocol the proxy you are using belongs to.
Learn more: What is a Proxy? How It Works and a Beginner's Guide to Using Proxies
Step 1: Add the Proxy to InviBrowser
First, open the Proxy management section in InviBrowser and select Add Proxy.
Here, you enter the Proxy information including:
-
Host: Proxy server address.
-
Port: Connection port.
-
Username: Login name if the proxy requires authentication.
-
Password: Password if applicable.
-
Tag: You can add tags to make it easier to search for and categorize proxies later.
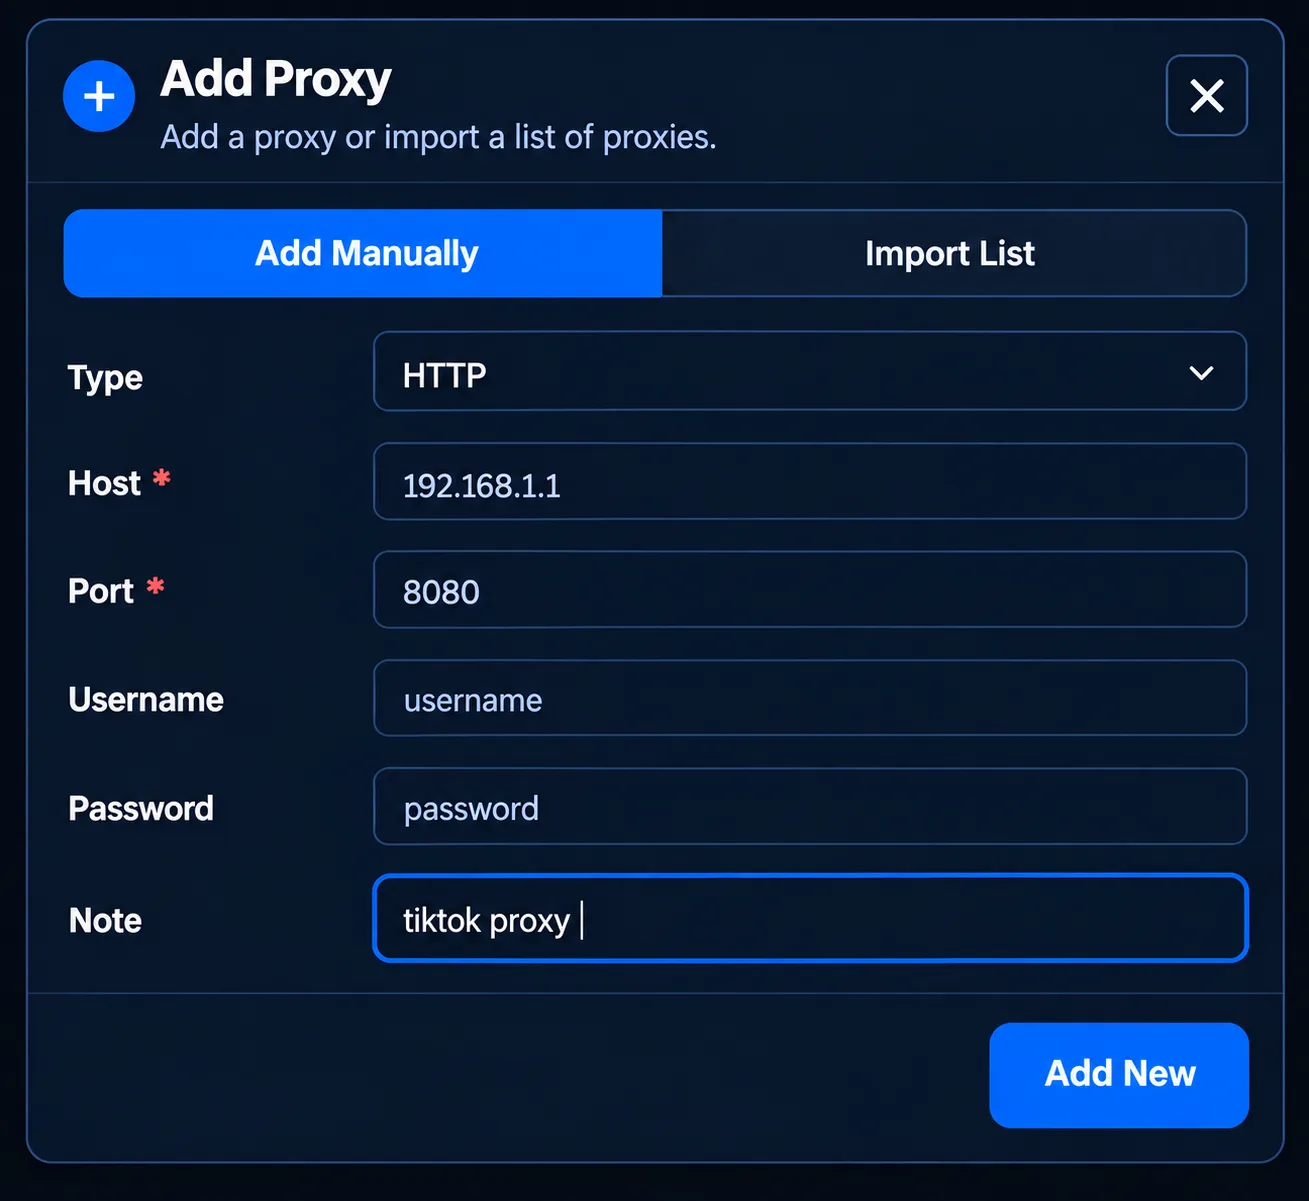
If the proxy does not require a username or password, you can leave these fields blank.
Tagging is especially useful when you manage multiple proxies, as it allows you to categorize them by country, project, or intended use.
After entering all the required information, proceed to save the Proxy to the list.
Step 2: Bulk Import Proxies if Needed
If you only have a few proxies, you can add each proxy individually.
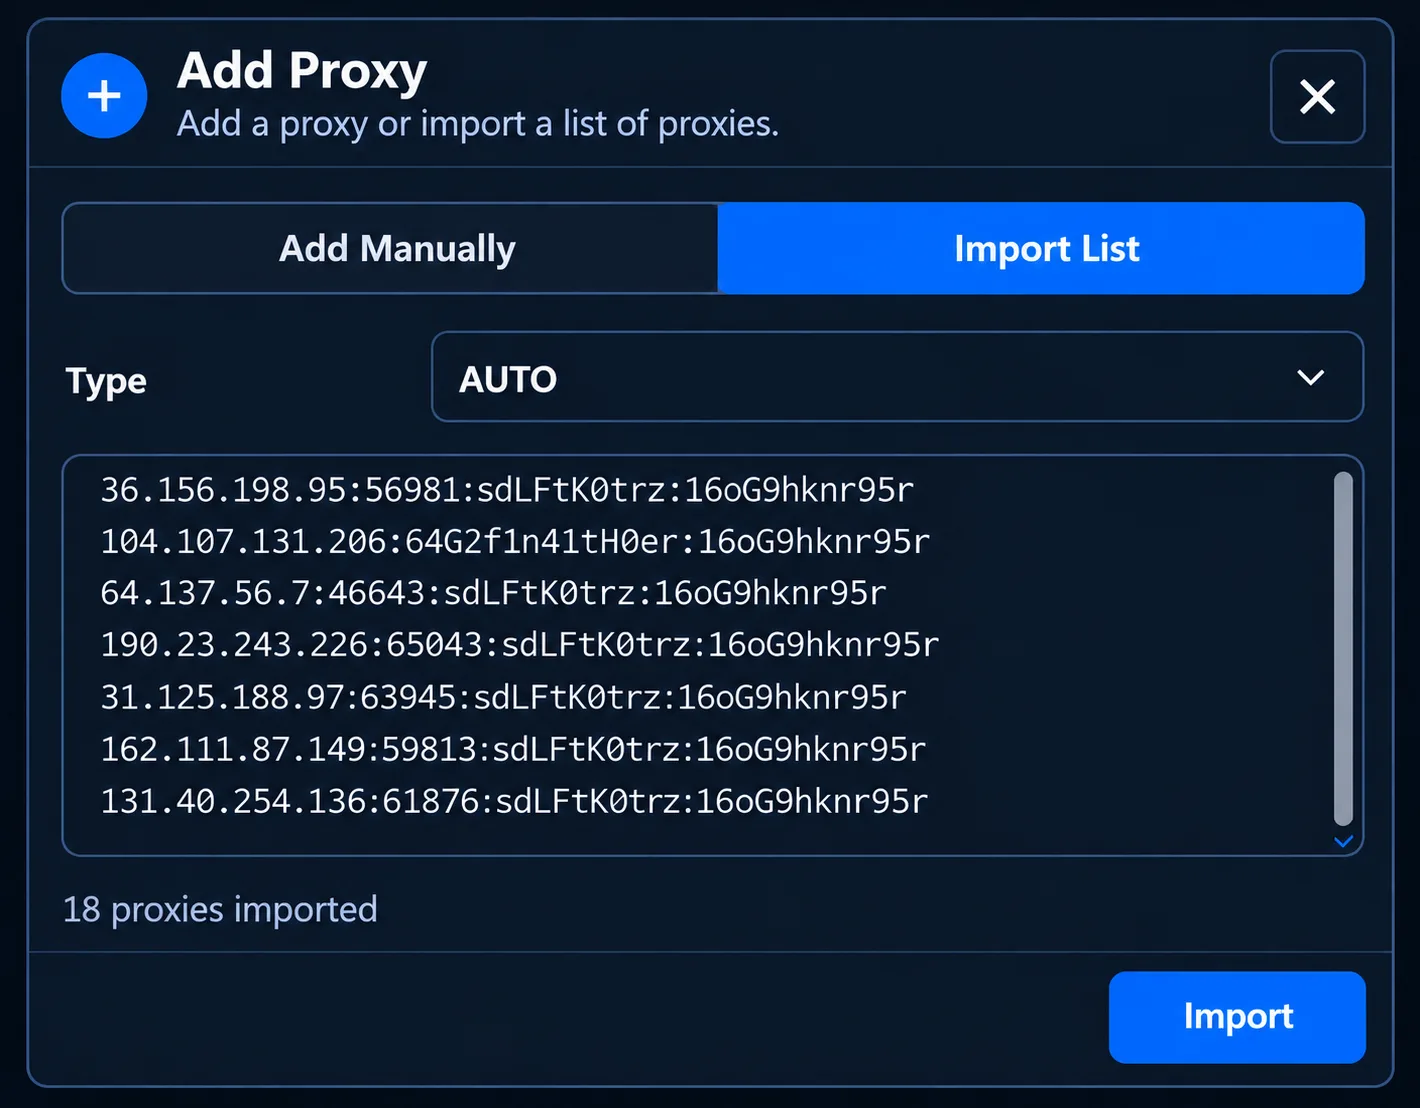
However, if you are managing multiple accounts and have a large list of proxies, InviBrowser supports importing multiple proxies at the same time.
Switch to the List tab and enter the proxies you need to add.
At this step, the default Proxy type can be left in Auto mode. InviBrowser will automatically detect the Proxy type instead of requiring you to select HTTP, SOCKS4, or SOCKS5 for each entry.
Bulk import saves time when you need to set up proxies for multiple Browser Profiles simultaneously.
Step 3: Test the Proxy before use
After adding a proxy, do not assign it to a Profile immediately. You should first check its operational status.
InviBrowser categorizes proxies into the following groups:
-
Live
-
Slow
-
Die
-
Not verified
-
All
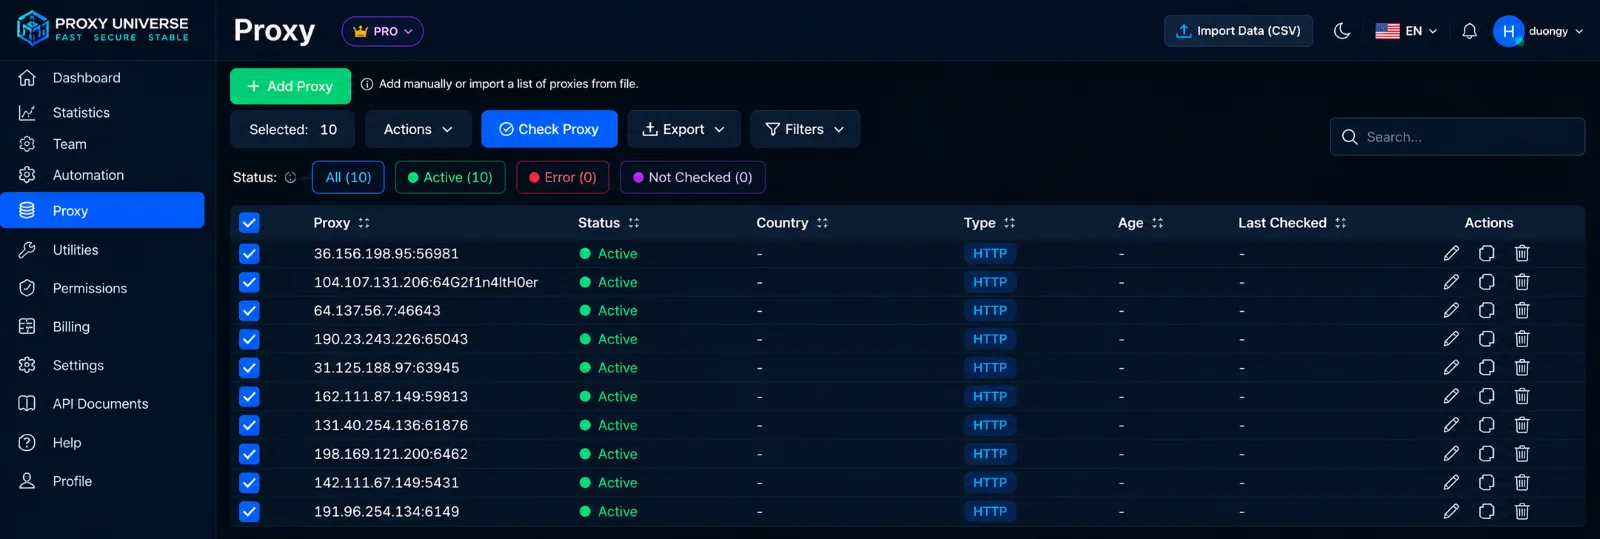
You can test each proxy individually or select multiple proxies to test them in batches.
After the check, InviBrowser displays information that helps you evaluate the proxy before use, such as:
-
Whether the proxy is working.
-
Fast or slow response speed.
-
Country of the IP address.
This check is particularly useful when you have just imported a large list of proxies. Instead of assigning proxies to profiles only to later find that they are not working, you can filter out problematic proxies in advance.
What should I do if the proxy is active but slow?
The proxy may still connect successfully but has poor response speed. In that case, InviBrowser will help you identify that the proxy belongs to the Slow group instead of simply checking "whether there is a connection".
If the proxy frequently responds slowly, you may consider re-testing it before adding it to your main usage profile.
Learn more: What to do if the proxy is slow? Causes and solutions.
Step 4: Assign Proxy to Browser Profile
After you have added and verified the proxy, the next step is to assign the proxy to the profile that needs to use it.
If the Profile already exists, follow these steps in order:
Profile → Select the profile to be assigned → Edit → Proxy → Select the newly added proxy → Save
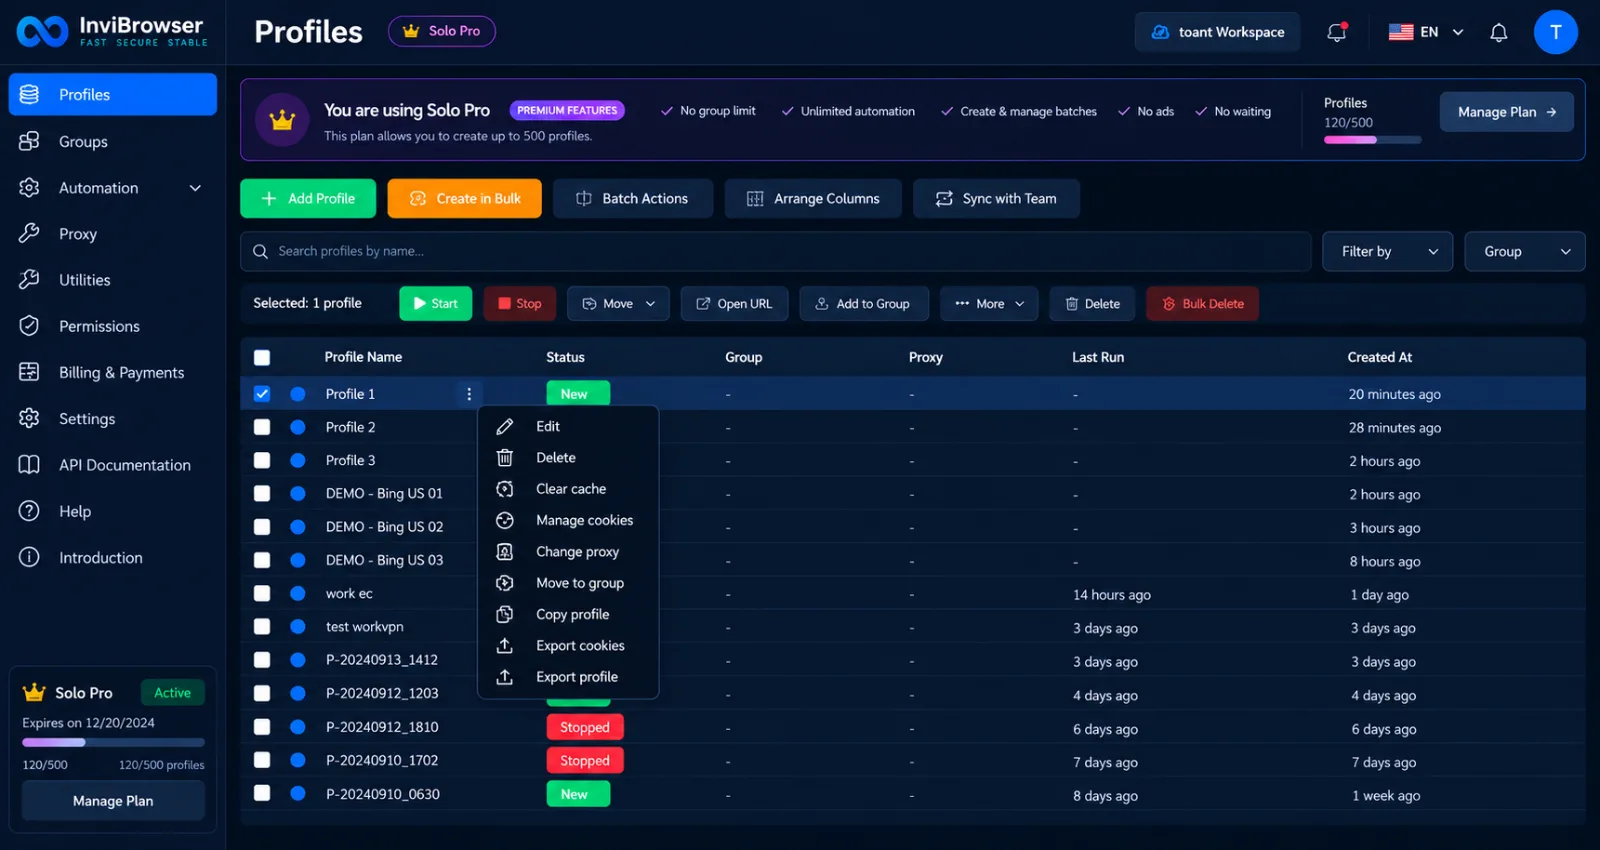
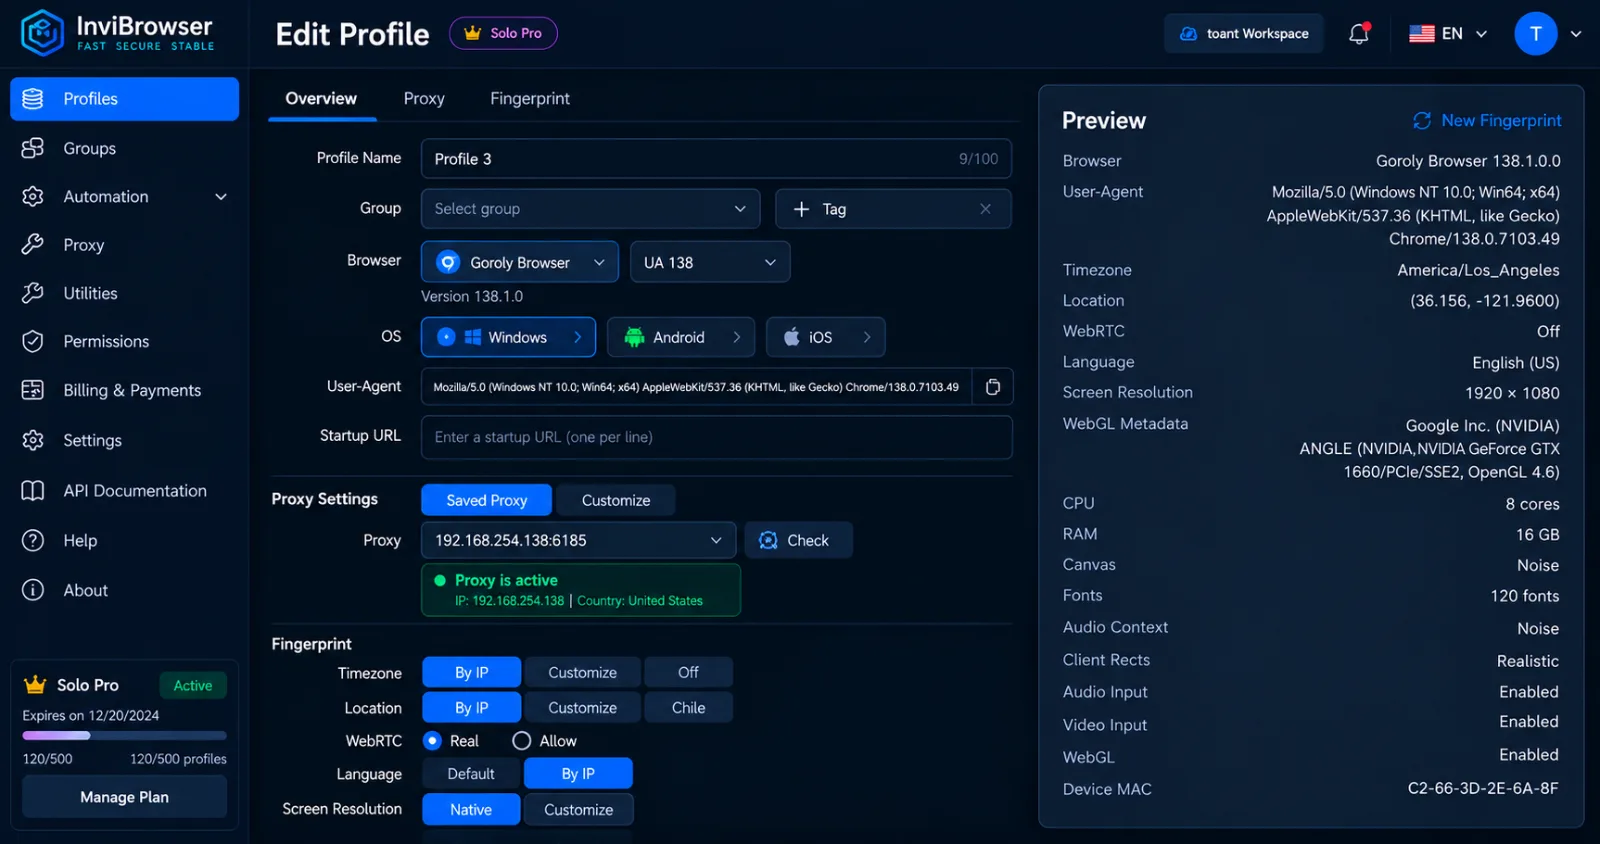
Accordingly, that Profile will use the Proxy you have selected when accessing the Internet.
You can also set up a proxy directly during the process of creating a new Profile.
The process will be:
Create New Profile → Proxy → Select Proxy → Complete Configuration → Save
Managing proxies on a per-profile basis makes it easy to identify which environment is using which IP address, especially as the number of profiles grows.
Learn more: Guide to creating and managing Profiles on InviBrowser
Step 5: Open the Profile and check the actual IP address
After assigning a proxy, you should open the Browser Profile and recheck the IP in the actual usage environment.
Following the instructions in the InviBrowser video, you can:
-
Open the Browser Profile that has just been assigned a Proxy.
-
Visit browserlix.com.
-
Open the WebRTC section.
-
Check the currently displayed IP address.
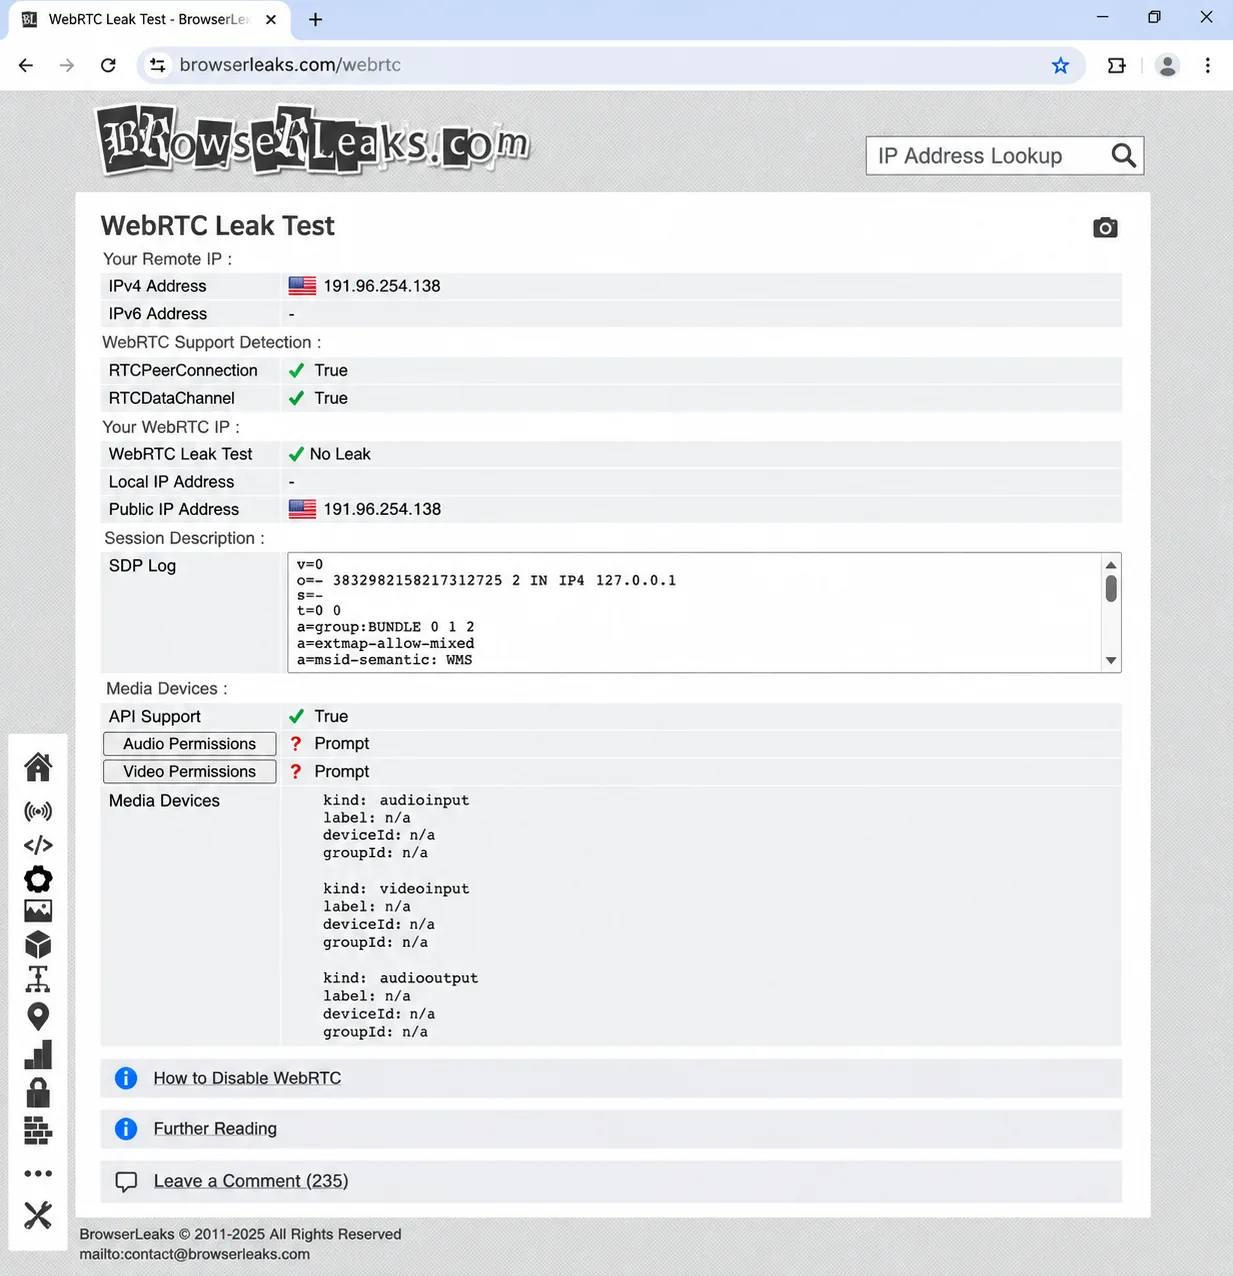
The purpose of this step is to confirm that the profile is using the intended proxy IP address and check whether WebRTC is unexpectedly exposing the real network IP.
A successful IP check should not be interpreted as meaning you are "completely anonymous on the Internet". This result only confirms that your Proxy and WebRTC configurations are working as expected at the time of the check.
Conclusion
Adding a proxy to InviBrowser is not just about entering the Host and Port. A complete workflow should include adding the proxy, checking its status, assigning it to a Browser Profile, and re-verifying the IP during actual use.
InviBrowser supports HTTP, SOCKS4, SOCKS5, bulk proxy import, and proxy classification by status, making it easier to manage and track multiple proxies and profiles.
If you want to review the entire live operation, you can watch the video Guide to Adding Proxies to InviBrowser on YouTube. See also:
You can try InviBrowser for free to add proxies, test connections, and set up Browser Profiles according to your usage needs.